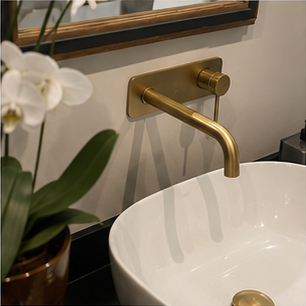
The tap is chosen before the wall is finished
Wall-mounted basin taps are one of those details that can make a bathroom look immediately more considered. They also expose poor coordination quickly. If the spout is too short, water can run against the back of the basin. If it is too long, it can splash over the front. If the outlet is too high or low, everyday use becomes awkward.
The correct position depends on the basin, the tap, the counter or vanity, and the final thickness of the wall finish. It cannot be decided accurately from a rough brick wall alone.
Projection is as important as height
A wall-mounted spout needs to reach the basin’s usable bowl area. The installer should check the manufacturer’s dimensions and compare them with the exact basin rather than relying on a generic measurement.
This is particularly important with countertop basins. Their rim height varies, and the tap position that works for one basin may be uncomfortable or splash-prone with another.
The finished wall changes the measurement
The rough-in point is set before plaster, board, waterproofing, adhesive and tile are complete. The finished surface is the reference that matters to the person using the bathroom.
A few millimetres can affect how a trim sits against the wall, whether the threaded connection is at the correct depth, and whether the tap feels properly supported. Concealed components should be installed to the manufacturer’s required finished-wall range.
Check the water and waste layout together
The basin tap should be considered at the same time as the basin waste, trap, vanity drawers, mirror and lighting. A beautiful tap position is not successful if the trap collides with a drawer or the mirror leaves no useful space above the basin.
In an upper-end Durban renovation, this coordination is part of the design rather than an afterthought. The aim is a bathroom that looks calm because the decisions behind it were resolved early.
Before the wall is closed, confirm the exact tap model, basin model, finished floor level, tile thickness and the position of the water connections. Do not treat a product image as an installation drawing.
See how Signature Bathrooms approaches a complete renovation at Durban bathroom renovations.
Related renovation guidance
For the wider project context, continue with related bathroom renovation guidance.